一、Nginx安装和基本操作命令
1、Nginx可以直接使用LNMP这样的一键安装包,例如:LNMP新版VPS主机控制面板安装。
2、如果你是用一个专门的服务器来作反向绑定域名用,则只需要安装一个Nginx即可,为VPS主要省点资源。命令:
wget http://sysoev.ru/nginx/nginx-0.7.64.tar.gz
tar zxvf nginx-0.7.64.tar.gz
cd nginx-0.7.64
./configure –user=www –group=www –prefix=/usr/local/nginx –with-http_stub_status_module –with-http_ssl_module –with-ipv6
make && make install
3、如果在执行以上命令遇到./configure: error: the HTTP rewrite module requires the PCRE library.错误提示,运行:
yum -y install pcre-devel openssl openssl-devel
4、执行以下命令,把ngx_http_substitutions_filter_module模块编译进去,主要为了反向绑定域名过滤到页面的URL地址。
git clone https://github.com/yaoweibin/ngx_http_substitutions_filter_module.git
./configure –prefix=/usr/local/nginx –with-http_stub_status_module –with-http_ssl_module –with-http_gzip_static_module –with-ipv6 –add-module=/root/nginx-0.7.64/ngx_http_substitutions_filter_module
make && make install
5、最后添加www用户,启动Nginx服务。
/usr/sbin/groupadd -f www
/usr/sbin/useradd -g www www
/usr/local/nginx/sbin/nginx
6、或者,你也可以直接使用以下命令:
cd /tmp
git clone git://github.com/yaoweibin/ngx_http_substitutions_filter_module.git # nginx 的过滤器模块(比http_sub_module更加灵活)
wget http://nginx.org/download/nginx-1.7.7.tar.gz
tar -xzvf nginx-1.7.7.tar.gz
cd /tmp/nginx-1.7.7
./configure \
–prefix=/www/wdlinux/nginx \ # 安装位置
–with-http_ssl_module \
–with-http_sub_module \
–with-http_gzip_static_module \
–with-http_stub_status_module \
–add-module=/tmp/ngx_http_substitutions_filter_module # 添加nginx过滤器模块
make & make install
7、Nginx的配置文件一般是在:/usr/local/nginx/conf 这个目录下nginx.conf。
8、修改了nginx.conf文件后,记得先检测一下语法是否正常:/usr/local/nginx/sbin/nginx -t,防止重启Nginx后服务器不正常。
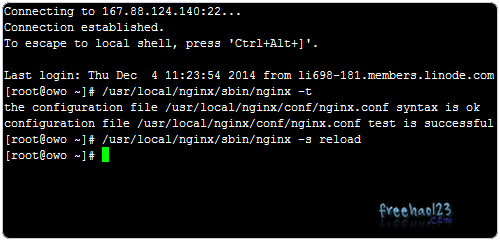
9、Nginx重启命令:/usr/local/nginx/sbin/nginx -s reload 或者 kill -HUP `cat /usr/local/nginx/logs/nginx.pid` 或者 service nginx resatrt
10、上面介绍的两种安装方法适合有一定VPS经验的朋友,这里还有一个适合新手朋友的安装命令:
yum -y install gcc automake autoconf libtool make
yum install gcc gcc-c++
cd /usr/local/src
wget ftp://ftp.csx.cam.ac.uk/pub/software/programming/pcre/pcre-8.34.tar.gz
tar -zxvf pcre-8.34.tar.gz
cd pcre-8.34
./configure
make
make install
cd /usr/local/src
wget http://zlib.net/zlib-1.2.8.tar.gz
tar -zxvf zlib-1.2.8.tar.gz
cd zlib-1.2.8
./configure
make
make install
cd /usr/local/src
wget http://www.openssl.org/source/openssl-1.0.1c.tar.gz
tar -zxvf openssl-1.0.1c.tar.gz
cd /usr/local/src
wget http://nginx.org/download/nginx-1.4.2.tar.gz
tar -zxvf nginx-1.4.2.tar.gz
cd nginx-1.4.2
git clone https://github.com/yaoweibin/ngx_http_substitutions_filter_module.git
./configure –sbin-path=/usr/local/nginx/nginx \
–conf-path=/usr/local/nginx/nginx.conf \
–pid-path=/usr/local/nginx/nginx.pid \
–with-http_ssl_module \
–with-http_sub_module \
–with-http_gzip_static_module \
–with-http_stub_status_module \
–with-pcre=/usr/local/src/pcre-8.34 \
–with-zlib=/usr/local/src/zlib-1.2.8 \
–add-module=/usr/local/src/nginx-1.4.2/ngx_http_substitutions_filter_module \
–with-openssl=/usr/local/src/openssl-1.0.1c
make
make install
/usr/local/nginx/nginx
二、Nginx反向绑定域名:最基本的方法
1、下面是一段最基本的Nginx反向绑定域名代码:
server
{
listen 80;
server_name freehao123.com;
location / {
proxy_pass http://www.google.com/;
proxy_redirect off;
proxy_set_header X-Real-IP $remote_addr;
proxy_set_header X-Forwarded-For $proxy_add_x_forwarded_for;
}
}
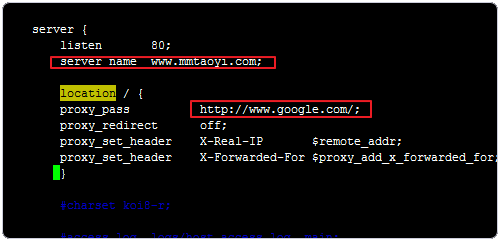
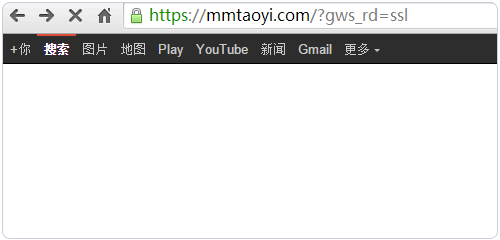
2、你只需要修改server_name和proxy_pass的值即可。保存nginx.conf,重启Nginx,打开你的域名,就可以看到反向的效果了。
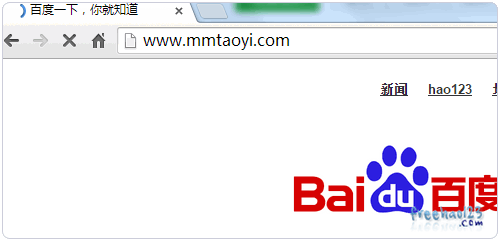
3、如果想要反向绑定百度,直接把域名修改为百度的域名。
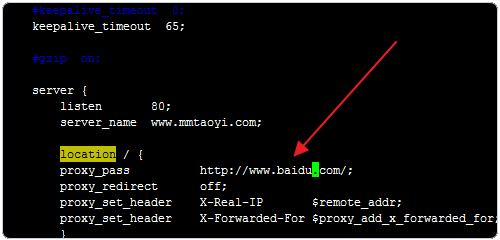
4、然后打开自己的域名,就可以看到是百度了。
三、Nginx反向绑定域名:带SSL证书
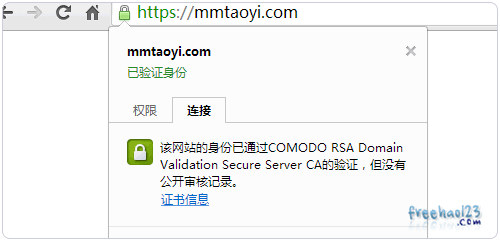
1、为了能够保证自己反向绑定的“安全”,一般建议使用SSL证书。SSL证书现在购买也不是很贵,参考:Namecheap SSL证书购买和SSL激活安装使用方法和新Godaddy Cpanel主机安装Godaddy SSL证书方法。
2、Nginx使用SSL进行反向绑定域名,修改nginx.conf如下:
server
{
listen 80;
server_name www.freehao123.com freehao123.com;
location / {
rewrite ^/(.*)$ https://freehao123.com$1 permanent;
}
}
server
{
listen 443;
server_name www.freehao123.com freehao123.com;
if ($host = ‘www.freehao123.com’) {
rewrite ^/(.*)$ https://freehao123.com$1 permanent;
}
ssl on;
ssl_certificate /root/myssl/myssl.crt;
ssl_certificate_key /root/myssl/privkey.key;
location / {
proxy_redirect off;
proxy_set_header X-Real-IP $remote_addr;
proxy_set_header X-Forwarded-For $proxy_add_x_forwarded_for;
proxy_set_header X-Forwarded-Proto https;
proxy_pass https://www.google.com;
proxy_set_header Host “www.google.com”;
proxy_set_header Accept-Encoding “”;
proxy_set_header User-Agent $http_user_agent;
}
}
3、代码对www和非www请求都统一到了Https的非www请求上了。ssl on是开启SSL,ssl_certificate 和ssl_certificate_key 是连接CRT和Key文件,你需要修改成你自己的路径。
4、不想购买付费的SSL证书的朋友,可以申请免费的StartSSL证书,已经被90%以上的浏览器所认可并支持:StartSSL免费SSL证书成功申请-HTTPS让访问网站更安全
四、Nginx反向绑定域名:subs_filter优化请求和解决Google验证码问题
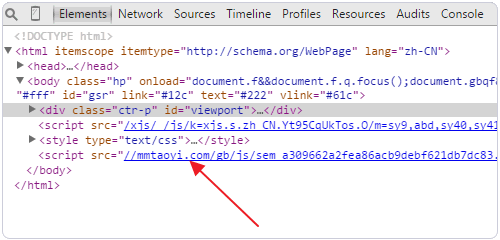
1、上面我们已经将ngx_http_substitutions_filter_module模块编译进入到了Nginx,这个模块主要是为了将网页中的所请求都转发自己的服务器。
2、在location 中加入以下代码,类似:
location / {
proxy_redirect off;
proxy_set_header X-Real-IP $remote_addr;
proxy_set_header X-Forwarded-For $proxy_add_x_forwarded_for;
proxy_set_header X-Forwarded-Proto https;
proxy_pass https://www.google.com;
proxy_set_header Host “www.google.com”;
proxy_set_header Accept-Encoding “”;
proxy_set_header User-Agent $http_user_agent;
subs_filter www.google.com freehao123.com;
subs_filter ssl.gstatic.com freehao123.com;
subs_filter_types text/css text/xml text/javascript;
}
3、单个IP地址如果在短时间内对Google发送大量的IP请求,会被Google判定为机器人,从而出现搜索验证码的情况,为了解决这个问题,我们可以在Http层加入以下代码,类似于:
upstream google { server 74.125.139.1:80 max_fails=3;
server 74.125.139.2:80 max_fails=3;
server 74.125.139.3:80 max_fails=3;
server 74.125.139.4:80 max_fails=3;
server 74.125.139.5:80 max_fails=3;
}
server {
listen 80;
server_name www.ilovexinji.com ilovexinji.com;
location / { rewrite ^/(.*)$ https://ilovexinji.com$1 permanent; }
}
4、upstream google 写了Google的服务器IP地址,如果请求量非常大的话,建议多写一些。
五、Nginx反向绑定域名:使用Nginx缓存来加速访问请求
1、nginx 自带的 proxy_cache 模块可以实现访问缓存,即第二次访问可以直接从自己的服务器读取相应的数据了,而不需要再来一次中转请求了。
2、先在Http层加入以下代码,类似:
proxy_cache_path /home/cache/freehao123 levels=1:2 keys_zone=one:10m max_size=10g;
proxy_cache_key “$host$request_uri”;
server
{
listen 80;
server_name www.freehao123.com freehao123.com;
location / {
rewrite ^/(.*)$ https://freehao123.com$1 permanent;
}
}
3、proxy_cache_path 是缓存目录路径,你需要提前创建好,并设置好读写权限。
4、接着在location中加入以下代码,类似于:
location / {
proxy_cache one;
proxy_cache_valid 200 302 1h;
proxy_cache_valid 404 1m;
proxy_redirect https://www.google.com/ /;
proxy_set_header X-Real-IP $remote_addr;
proxy_set_header X-Forwarded-For $proxy_add_x_forwarded_for;
proxy_set_header X-Forwarded-Proto https;
proxy_pass https://www.google.com;
proxy_set_header Host “www.google.com”;
proxy_set_header Accept-Encoding “”;
proxy_set_header User-Agent $http_user_agent;
}
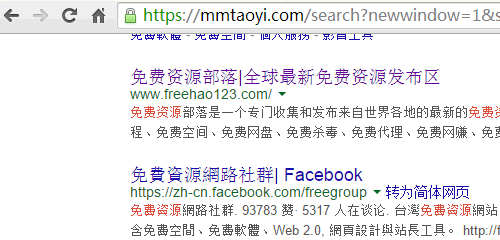
5、proxy_cache 中的值要与前面的keys_zone值相同。重启Nginx后,可以使用Https访问了。
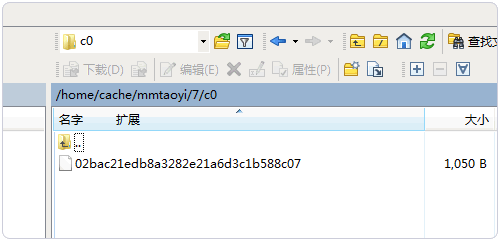
6、同时打开缓存目录,能看到生成了缓存数据了。
六、Nginx反向绑定域名:解决Google和Gravatar无法访问的问题
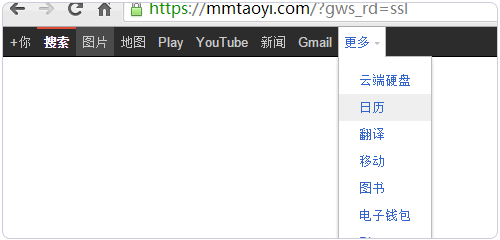
1、上面的代码都是基于反向D理Google的,以下就是经部落测试有效的代码,你只需要将域名、upstream IP地址、证书路径、缓存目录等改自己的内容即可:
http {
include mime.types;
default_type application/octet-stream;
sendfile on;
proxy_connect_timeout 5;
proxy_read_timeout 60;
proxy_send_timeout 5;
proxy_buffer_size 16k;
proxy_buffers 4 64k;
proxy_busy_buffers_size 128k;
proxy_temp_file_write_size 128k;
proxy_temp_path /usr/local/src/cache/temp;
proxy_cache_path /usr/local/src/cache/one levels=1:2 keys_zone=one:10m inactive=7d max_size=10g;
proxy_cache_key “$host$request_uri”;
upstream google {
server 64.15.24.122:80 max_fails=3;
server 92.19.28.214:80 max_fails=3;
server 64.150.13.60:80 max_fails=3;
}
server {
listen 80;
server_name www.mmtaoyi.com mmtaoyi.com;
rewrite ^/(.*)$ https://mmtaoyi.com$1 permanent;
location / {
root html;
index index.html index.htm;
}
error_page 500 502 503 504 /50x.html;
location = /50x.html {
root html;
}
}
server {
listen 443;
server_name www.mmtaoyi.com mmtaoyi.com;
if ($host = ‘www.mmtaoyi.com’) {
rewrite ^/(.*)$ https://mmtaoyi.com$1 permanent;
}
ssl on;
ssl_certificate /usr/local/src/myssl/myssl.crt;
ssl_certificate_key /usr/local/src/myssl/privkey.key;
location / {
proxy_cache one;
proxy_cache_valid 200 302 1h;
proxy_cache_valid 404 1m;
proxy_cache_valid 301 3d;
proxy_cache_valid any 1m;
proxy_cache_use_stale invalid_header error timeout http_502;
proxy_redirect https://www.google.com/ /;
proxy_cookie_domain google.com mmtaoyi.com;
proxy_pass http://google;<br< a=””> /> proxy_set_header Host “www.google.com”;
proxy_set_header Accept-Encoding “”;
proxy_set_header User-Agent $http_user_agent;
proxy_set_header Accept-Language “zh-CN”;
proxy_set_header Cookie “PREF=ID=047808f19f6de346:U=0f62f33dd8549d11:FF=2:LD=zh-CN:NW=1:TM=1325338577:LM=1332142444:GM=1:SG=2:S=rE0SyJh2w1IQ-Maw”;
subs_filter_types text/css text/xml text/javascript;
subs_filter ssl.gstatic.com mmtaoyi.com;
subs_filter www.google.com mmtaoyi.com ;
}
location /gb {
proxy_pass http://ssl.gstatic.com/gb/;
proxy_set_header Accept-Encoding “”;
}
}
}
2、解决Gravatar头像无法显示的问题也是一样的原理,我们只需要将反向绑定的域名换成Gravatar的secure.gravatar.com就行了。
3、解决Gravatar头像不显示的代码,部落测试有效的如下:
proxy_cache_path /home/cache/mmtaoyi levels=1:2 keys_zone=one:10m max_size=10g;
proxy_cache_key “$host$request_uri”;
server
{
listen 80;
server_name www.mmtaoyi.com mmtaoyi.com;
location / {
rewrite ^/(.*)$ https://mmtaoyi.com$1 permanent;
}
}
server
{
listen 443;
server_name www.mmtaoyi.com mmtaoyi.com;
if ($host = ‘www.mmtaoyi.com’) {
rewrite ^/(.*)$ https://mmtaoyi.com$1 permanent;
}
ssl on;
ssl_certificate /root/myssl/myssl.crt;
ssl_certificate_key /root/myssl/privkey.key;
location / {
proxy_cache one;
proxy_cache_valid 200 302 1h;
proxy_cache_valid 404 1m;
proxy_redirect off;
proxy_set_header X-Real-IP $remote_addr;
proxy_set_header X-Forwarded-For $proxy_add_x_forwarded_for;
proxy_set_header X-Forwarded-Proto https;
proxy_pass https://secure.gravatar.com;
proxy_set_header Host “secure.gravatar.com”;
proxy_set_header Accept-Encoding “”;
proxy_set_header User-Agent $http_user_agent;
}
}
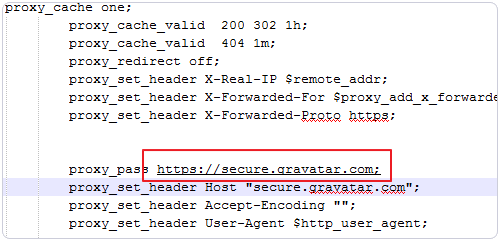
3、访问自己的域名后,会看到是Gravatar网站的内容。

4、将自己的域名替换为Gravatar头像的域名,就能够正常显示图片了。

七、Nginx反向绑定域名方法小结
1、上面介绍了三种单独安装Nginx的方法,都是经过部落测试通过的,启动了Nginx后就可以用你的浏览器打开IP地址访问到有Nginx标志的页面了。如果无法访问,建议检查VPS主机的防火墙有没有开启80和443端口,开启方法:
/sbin/iptables -I INPUT -p tcp –dport 80 -j ACCEPT
/sbin/iptables -I INPUT -p tcp –dport 443 -j ACCEPT
/etc/init.d/iptables save
/etc/init.d/iptables restart
2、ngx_http_substitutions_filter_module这个模块是用来替换反向绑定域名页面的关键词,在第三种安装Nginx的方法中增加了这个模块。像Google这样的的加载了ssl.gstatic.com这个网址的内容,我们也都一并将其替换了。
原文:http://www.freehao123.com/nginx-google/

关注公众号『长空雪』
搬孕工 分享孕妇写真 关注我微信公众号 长空雪 “情而不色”是我公众号的风格


